The OPTIV ADVANCE/ADVANCE F composite image measurement instrument adopts a stable fixed bridge structure, thanks to its high-end central processing, high accuracy, and rich configuration. It is a highly competitive 3D composite image measurement device.
Wide application range and strong practicality
The flexible and highly reliable OPTIV ADVANCE/ADVANCE F series composite image measuring instrument supports multiple sensors, and can quickly complete multiple feature measurements with one clamping and one setting. Widely used in automotive electronics, mobile phone parts, precision mechanical processing, providing composite measurement solutions for metal processing parts, plastic parts, LCD panels, and related components.
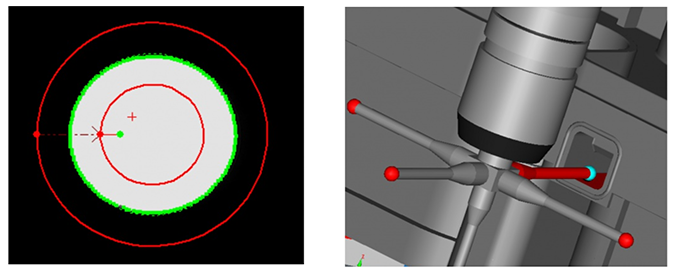
1.Small square grooves and small holes make it easy to measure through holes and surface contours using an optical probe.
2. Use a contact probe to specify the coordinate position point, evaluate flatness, and measure the size of the side inner hole.

Measurement plan
1. Mobile phone parts
Composite measurement solves measurement difficulties such as overall dimensions, width dimensions of mating holes, contour dimensions, and mating surfaces in one go. More efficient and accurate detection.
2. LCD panel
Measure transparent, reflective, and low contrast surfaces, and achieve high-precision 2D dimension detection, height dimension detection, and contour dimension detection.
3. Automotive Electronics
The size of the inner hole is measured using contact method, while the small hole and narrow rib are measured using optical high magnification focusing. The optical profile scans the curved opening boundary of the workpiece.
4. Connector
Coaxial light facilitates blind hole measurement, and PC-DMIS software array automatic programming for measurement and evaluation.
5. PCB board
Measurement of PCB bending and warping, position of holes, thickness of solder mask, height and angle of the chip after insertion.

Product advantages
More efficient and accurate detection; The OPTIV ADVANCE/ADVANCE F series features a high-end central processing unit with excellent optical performance and support for multiple sensors.
? The overall granite material adopts a fixed bridge structure, with central drive for all three axes and precise linear guide rails, which have high precision and reliability��;
? High speed CNC control system, fully servo closed-loop control�����;
? High resolution color digital camera with high-definition image effects and high-quality images�����;
? Equipped with fully automatic high-precision zoom lens�����;
? Coaxial light, transmitted light, multi segment surface annular light��;
? Can provide contact triggered probe, confocal white light sensor, and line laser sensor����;
? The Z-axis can be upgraded to 300mm��;
? Equipped with METUS or PC-DMIS VISION measurement software�����。
Measurement system software
PC-DMIS VISION is a composite measurement software developed by Hexconn for image measurement machine users.
It adheres to the core technology of the measurement software PC-DMIS, with an intuitive operating interface and intelligent feature automatic recognition function. Offline programming operation and simulation optimization of detection paths make this software easy to learn, efficient and practical.
METUS is a full vision measurement software designed and developed by a Hexconn software design team with years of industry experience based on PC-DMIS. Adhering to the core technology of the measurement software PC-DMIS, it is specially developed for imaging products. In the development process of METUS, in addition to implementing the concept of meticulous measurement standards, the principle of easy learning and easy use has also been implemented.


